
View modes
Octostitch shows a design three ways. Switch between them from the View menu (and the viewport controls). Each view answers a different question.
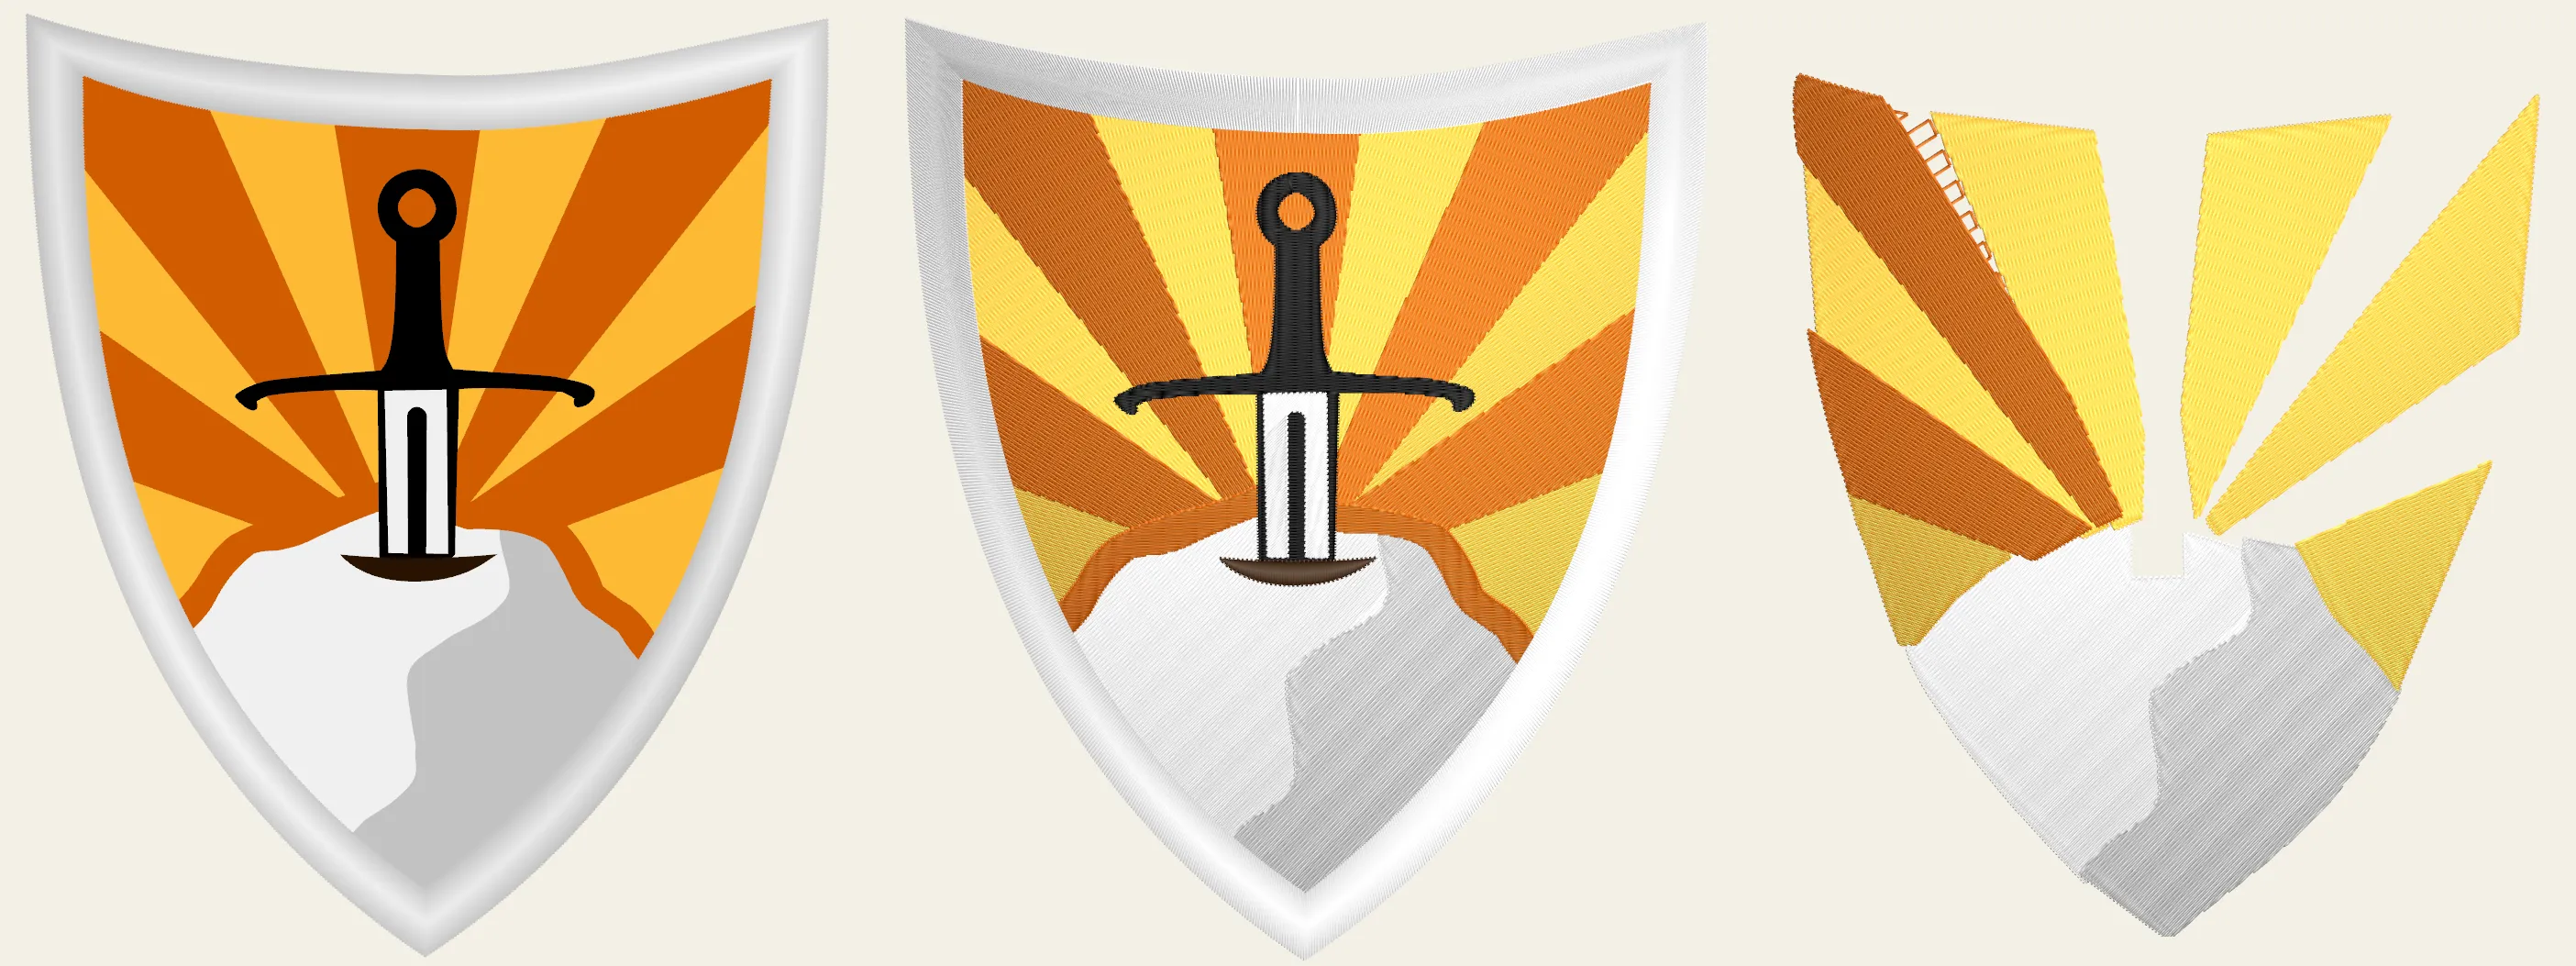 One design in Technical, Preview and Simulation view.
Technical view
Section titled “Technical view”The default working view. It shows the structure of the design — the underlying paths, anchor nodes, satin rails and manual points — so you can edit precisely. This is where you draw, shape nodes and place meta nodes.
Technical view can also show a high-contrast path outline for each object — Bezier outlines in Display options, off by default — whose colour auto-contrasts against the thread colour so it stays legible on both light and dark threads.
A fill with a gradient on it is drawn here as a smooth ramp across the shape, because that’s the design intent — it’s the ramp you set, shown where it will land.
Preview view
Section titled “Preview view”Preview renders the stitches themselves — what the thread will actually look like — without the editing overlays. Use it to judge coverage, colour and the overall look of the finished piece.
This is also where a gradient tells the truth. Technical view draws the smooth ramp you designed; Preview and Simulation draw the interleaved solid passes the machine actually sews to suggest it, each stitch in the thread it will really be sewn with. If a blend is going to read as stripes rather than a fade, it’s here that you’ll see it.
How the thread is drawn
Section titled “How the thread is drawn”Three settings in Display options control how convincing that render is. They’re independent of the view mode, and remembered between sessions.
- Thread thickness (0.1–0.6 mm) — how wide each stitch is drawn. Set it close to the thread you actually sew with: too thin and a dense fill reads as gappy, too thick and everything reads as solid.
- Thread texture — gives the thread its own surface: the plies twisting around each other and the filaments inside them. On by default, and worth turning off only if you want to see the bare geometry.
- Realistic lighting — shades the stitches as lit 3D cylinders so the sheen falls across them the way it does on cloth. Two modes: Point light, a single movable light you can drag around the canvas, and Environment, which lights the design from an image-based environment. Turn the whole thing off for flat, unshaded colour.
Texture and lighting are separate: the thread keeps its surface with the light off, and keeps its shading with the texture off.
Simulation view & playback
Section titled “Simulation view & playback”Simulation shows the design in sewing order and lets you play it back like a video of the machine running. This is the best way to catch problems before you sew:
- Play / pause the stitch-out, with an adjustable playback speed — 0.01× to 10×, so you can crawl through a tricky corner stitch by stitch or race through a big fill.
- Step forward and back by a set number of stitches.
- See where jumps, travels and colour changes fall.
Watching the simulation is the quickest sanity check that objects sew in the order you intend and that branching and colour sequencing came out right.
Viewport toggles
Section titled “Viewport toggles”Independently of the mode, you can toggle overlays such as the needle-point crosses, jump stitches, path lines, grid, axes and rulers, and opaque vs translucent fills — so you can dial the canvas in for whatever you’re working on.