
Creating .octofont fonts
An .octofont is a true embroidery font — its letters are real satin columns with
proper embroidery construction, not filled TTF outlines. You build one glyph at a
time from objects you’ve already digitised, then use the font in any
text box.
The authoring flow
Section titled “The authoring flow”The core idea: digitise a letter the way you want it stitched, then register it as a glyph in a font.
- Digitise a glyph on the canvas — typically as satin columns — and select the object(s) that make it up.
- Choose Tools → Add to font…
- In the dialog, tell Octostitch what this glyph is:
- the character it represents,
- its left and right bounds (the horizontal spacing / side bearings), and
- the baseline it sits on.
- Save it into a new font (give it a name and an em size in mm) or add it to an
existing
.octofont.
Repeat for each character. Octostitch remembers the font you last saved into, so authoring a whole alphabet defaults to the same target.
Saving & sharing
Section titled “Saving & sharing”Your custom fonts appear in the font picker for text boxes automatically. Each font is
a single self-contained .octofont file, so sharing one — or moving it to another
machine — is just a matter of copying the file into the fonts folder.
For now, the user fonts folder is:
- Windows —
%APPDATA%\octostitch\fonts - macOS / Linux —
octostitch/fontsunder your config directory (e.g.~/.config/octostitch/fonts)
Drop an .octofont there and it’ll show up in the font picker; copy one out to share
it. Octostitch reads its bundled fonts and your user fonts folder, with your fonts
taking priority if a name clashes.
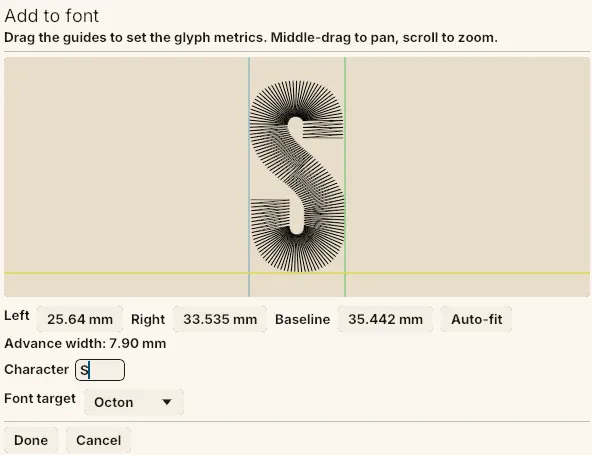 The Add to font dialog — drag the left, right and baseline guides to set the glyph’s metrics, then assign it a character and a target font.