
Satin column tool
The Satin Column tool (C) draws a satin column — the glossy, dense stitching
used for lettering, borders and tapering shapes. For the column’s settings (spacing,
underlay, auto-split and more), see the Satin column
reference.
The two-rail model
Section titled “The two-rail model”A satin column is defined by two rails — the two long edges of the column. The stitches zigzag back and forth between the rails, so the distance between the rails at any point sets the width of the column there. Rails that stay parallel give a constant-width band; rails that come together give a taper.
Drawing the column
Section titled “Drawing the column”- Arm the Satin create button (or press
C). - Click to add points, alternating between the two rails — one click on the left edge, the next on the right, and so on. Each pair of points defines a “rung” across the column, and Octostitch fills the satin between them as you go.
- Press
Escapeto finish the column.
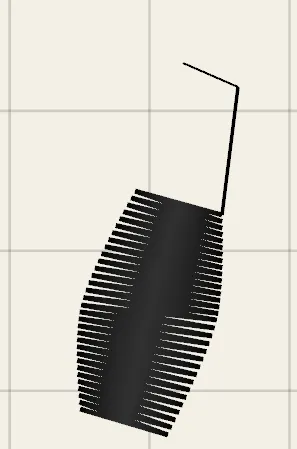 A column mid-draw: clicks alternate between the two rails and the satin fills the rungs between them as you go.
Continuing a rail
Section titled “Continuing a rail”To extend an existing satin column, select the Satin Column tool and click on one of the green end nodes at either end of the column. The normal alternating-click behaviour then resumes from that end, so you can keep adding rungs onto the column you already have.
Adjusting the column after drawing
Section titled “Adjusting the column after drawing”Switch to the Edit tool to reshape either rail, and use meta nodes to taper the width along the column. Keep an eye on the width: very wide satin stitches can snag, which is what the auto-split setting is for.
Starting from a shape instead
Section titled “Starting from a shape instead”You don’t have to draw the rails. If you already have the shape as an outline — traced over a reference image, imported from SVG, or drawn with the pen — then Convert to satin column traces the rails out of it for you — you cut the shape into sections and set the stitch direction with rungs.
Rails made that way are ordinary rails, so everything on this page applies to them afterwards.