
Wide run
A wide run is a running stitch given a width. Instead of one line of stitches down the path, it sews several copies of the path side by side — a band of parallel rows centred on the line.
It sits with the line stitches, not the fills: it follows a path rather than covering a closed region, so it works on open or closed paths and needs no enclosed area. Reach for it when a running stitch is too thin and a satin column is the wrong shape — thick outlines, borders that follow a drawn line, wide quilting lines, sashiko-style bands, and any place you’d otherwise draw a fill just to get a stripe.
Pick it from the stitch style buttons in the Stitches tab; it’s the third button on the top row, between Bean and Zigzag.
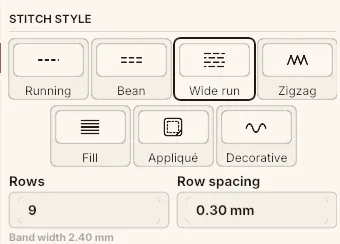 Wide run picked from the stitch style buttons, between Bean and Zigzag — nine rows at 0.30 mm spacing, with the resulting band width read back underneath.
Width: rows, not millimetres
Section titled “Width: rows, not millimetres”The band’s width is set as a row count and a row spacing, and the millimetres are read back to you:
- Rows (1–64) — how many parallel lines make up the band.
- Row spacing (0.1–3 mm) — the gap between neighbouring rows, i.e. the density.
Underneath, the panel shows the width the band actually comes out at — “Band width 1.20 mm” — recalculated as you change either field.
Width is a count rather than a measurement because there’s no such thing as half a row: widening the band means adding a line of stitching, and the mm figure is the consequence, not the control. A new wide run starts at 5 rows at the default fill row spacing, which is 1.5 mm of solid cover.
One continuous run
Section titled “One continuous run”The rows are sewn serpentine — down one row, across, back along the next — so the whole band is a single unbroken run with no jumps inside it. The step from the end of one row to the start of the next is one stitch the length of the row spacing, which lands inside the band and is covered by it.
That also means a wide run branches like a running stitch does: because the band is sewn over the path, travel doubling back along the spine disappears into the middle of the band. See Branching & routing.
Stitch placement along the band
Section titled “Stitch placement along the band”Where the needle lands along each row is either the plain stagger or a tatami pattern — the same pattern library the parallel fill uses, read along the path’s arc length instead of across a shape.
With no pattern set (the default), you get the usual stagger controls:
- Stitch length (0.3–20 mm) — the step along each row.
- Stagger offset — how far each successive row is shifted, as a fraction of a stitch (0.5 is the classic half-stitch tatami).
- Repeat rows (2–8) — how many rows before the stagger pattern repeats.
Choose a pattern from the picker and those three are replaced by:
- Pattern scale — resizes the motif’s lengths.
- Row repeat — sews each row of the pattern on this many rows of the band before moving to the next, which is the only way to stretch a pattern across the band (rows are the band’s spacing, not the pattern’s).
The pattern grid is anchored at the start of the path and is absolute, so every row lines up the way the design says, and extending a path doesn’t shift the stitches already on it. Both ends of every row are always sewn, so the band’s corners reach the path’s ends rather than stopping at the last whole pattern stitch.
Max stitch length
Section titled “Max stitch length”- Max stitch length (optional, 0.5–20 mm) — caps how far a single stitch may reach, spreading extra needle drops evenly along any gap longer than the cap. The extra drops land on the line the pattern already drew, so a motif’s shape is unaffected and only the holes multiply.
Worth switching on with a scaled-up pattern, where the motif’s own longest stitch grows with the scale.
Meta nodes
Section titled “Meta nodes”A wide run honours the angle overrides on meta nodes: where you’ve set one, the band leans that way instead of sitting square to the path. Width overrides are ignored — the band’s width is a row count, and there’s no half a row to interpolate to. To taper, use a satin column instead.
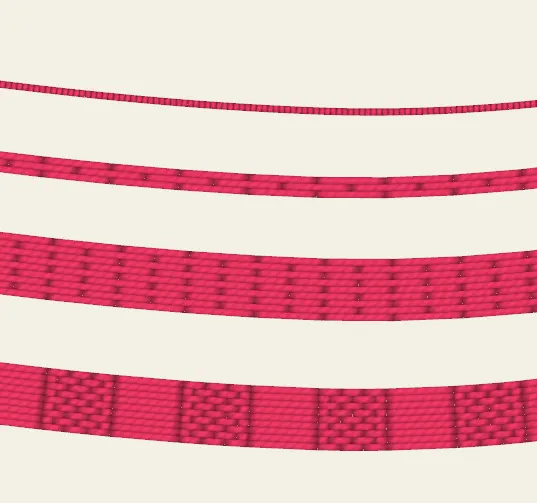 One curve, four ways — a running stitch, then wide runs of three rows, nine rows, and nine rows with a tatami pattern along them. Even at full width the band reads as parallel rows of running stitch rather than as a fill.