
Auto-digitising images
Auto-digitising turns a raster image (a logo, a piece of clip art, a drawing) into a first pass of stitch objects you can then refine. Convert Image is a guided four-step wizard: you set the finished size, choose the thread colours, brush the image to say what should and shouldn’t be sewn, and then decide how each colour is stitched.
Open it from File → Convert Image…, or convert a reference image in place — Convert to stitches… in the References tab — so the result lands right over the original at the same size, position and rotation.
All four steps share one pan/zoom canvas, and the view carries across them, so zooming in on a detail in one step keeps you there in the next. Split view — on by default, from the last three steps — shows the original beside the working image, with both panes panning and zooming together. Turn it off and a Show the original tick flips between them in the one pane instead.
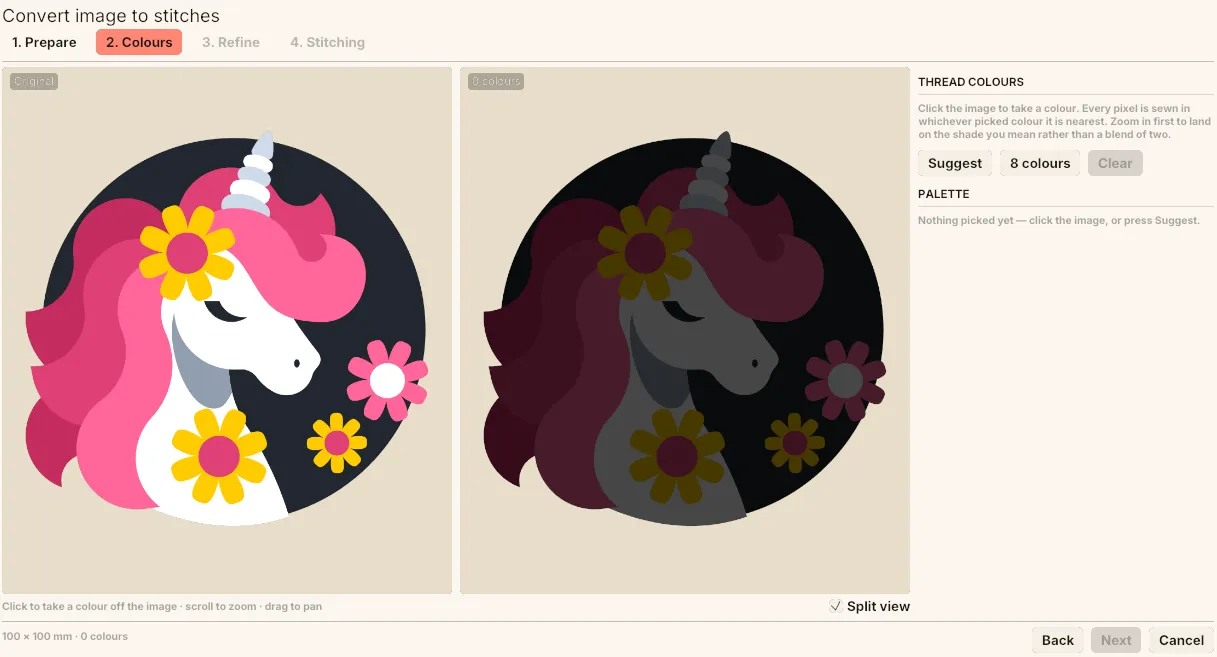 The wizard on step 2, Colours — the step strip along the top, split view showing the original beside the working image, and the current step’s controls on the right.
1. Prepare — crop and size
Section titled “1. Prepare — crop and size”Size comes first, because every millimetre-denominated control after it (brush width, smallest feature) is meaningless until the design knows how big it’s going to be.
- Width / Height (1–2000 mm) — the finished size of the design, with a Lock ratio tick to keep the proportions.
- Crop — drag on the image to keep just part of it. Everything outside is discarded before anything else runs. Use the whole image puts it back.
- Detail available — a readout of the source pixels, the working pixels and how many millimetres one pixel is. Worth a look: it tells you whether there’s enough resolution in the artwork for the size you’ve asked for.
2. Colours — build the thread palette
Section titled “2. Colours — build the thread palette”Every pixel is sewn in whichever picked colour it’s nearest, so this step is where you decide how many threads the design costs.
Click the image to take a colour. Picking is the only way the palette is set — zoom in first so you land on the shade you mean rather than a blend of two. Suggest fills the list in with an automatic split into a chosen number of colours, which you then prune; Clear empties it so you can pick every colour yourself.
Suggest-then-prune is the recommended order, but the automatic split spends colours where the pixels are, not where the design needs them — so expect to remove a few.
Each row of the palette shows the colour, the percentage of the image it covers, and two actions:
- Skip — leave this colour unstitched.
- Remove — take it out of the palette. Its pixels move to whichever colour is next closest.
Click a swatch to change the thread colour itself. The panel warns you when two entries are nearly the same colour (“one thread would do for each pair”) — two threads doing one thread’s job is a wasted colour change and a wasted spool.
3. Refine — brush the image
Section titled “3. Refine — brush the image”This is the annotation step, and it’s what makes the automation worth steering. A photograph’s background, a scan’s paper, a JPEG’s halo — none of them are things a tracer can be told about through a slider, and all of them are two seconds with the eraser.
Three brush tools:
- Erase — mark as background, not sewn.
- Paint — sew this area in a colour you pick from the palette swatches.
- Restore — put back what the colours step decided.
Brush size runs from 0.3 to 25 mm on a logarithmic slider. Undo and Redo buttons sit under the tools, and Ctrl+Z / Ctrl+Shift+Z work while the wizard is open.
Two clean-up controls finish the step:
- Smallest feature (0–5 mm) — absorbs anything smaller than this into what surrounds it. Kills speckle and closes pinholes in one go; both are just runs too small to sew.
- Smoothing (0–100) — low follows the pixels and keeps corners, high rounds the outlines off.
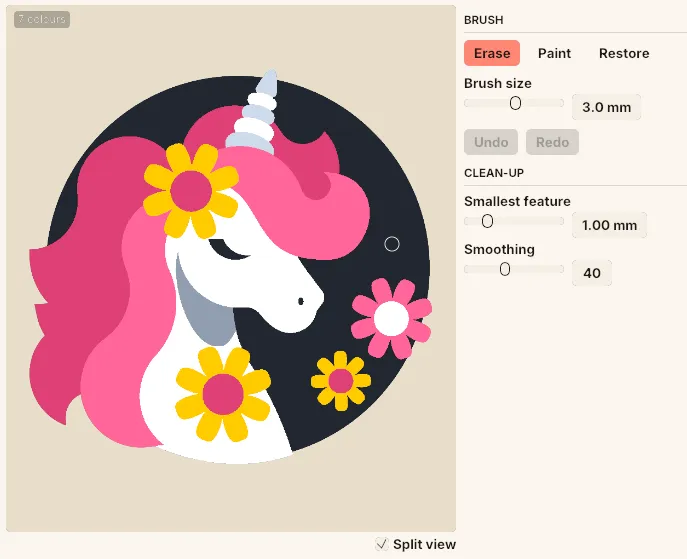 The Refine step — Erase selected at a 3 mm brush, its outline showing on the canvas, with the Smallest feature and Smoothing clean-up controls underneath.
4. Stitching — how each colour is sewn
Section titled “4. Stitching — how each colour is sewn”The last step assigns a role to every colour that isn’t skipped:
| Role | What it makes |
|---|---|
| Tatami fill | The general-purpose area fill. The default |
| Satin fill | Satin rungs edge to edge — right for narrow regions: lettering, stems |
| Outline | Just the outline, as a running stitch |
| Skip | Not sewn at all |
Fill and satin roles also take an angle (0–179°) — the stitch direction for that colour.
This region overrides one shape rather than a whole colour: click a region on the image and the panel names its area in mm² and which colour it belongs to, then lets you give it its own role. Follow the colour puts it back. Use it for the one narrow element inside an otherwise broad colour — a stem in a block of green.
Under Finishing, Remove overlapping areas clips each filled shape by the shapes stacked on top of it, so overlapping regions are stitched once instead of once per layer. Clipped shapes become polygons — their curves are flattened — and shapes hidden completely are dropped. See Importing SVG for the detail.
A line at the bottom counts any regions that won’t be sewn, so nothing disappears silently.
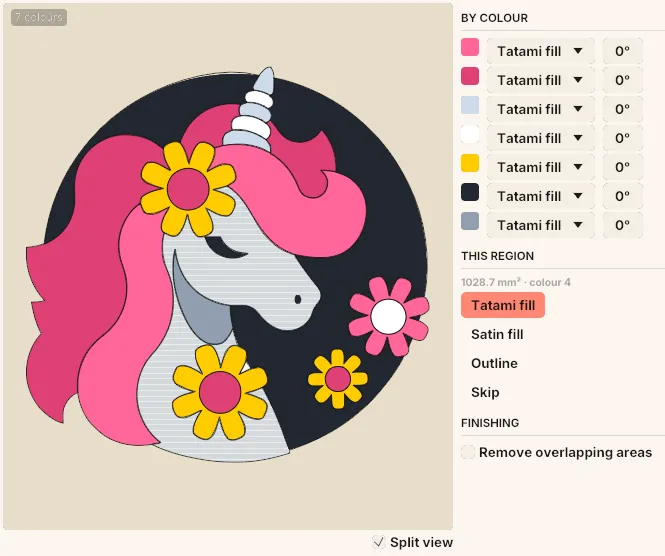 The Stitching step — a role and an angle per colour on the right, and This region overriding the one shape clicked on the canvas, which the panel names by area and colour.
Getting a good result
Section titled “Getting a good result”Cleaner input art traces better: flat colours, crisp edges and few colours give far better results than a photo. Beyond that, most of the quality comes from steps 2 and 3 — a carefully picked palette and two minutes with the eraser beat any amount of slider fiddling.
After converting, plan to:
- Check the stitch types it assigned and change the ones that want something else — a satin column for a border, a wide run for a thick line.
- Add underlay where it’s needed.
- Merge or delete stray little regions, and simplify busy paths.
- Set the colour sequence.
- Check it in Simulation view before exporting.