
Appliqué
Appliqué is stitching a piece of fabric onto the base fabric and securing its edge with embroidery. The appliqué stitch type builds the whole sequence from a single closed path — including the machine STOPs where you need to work by hand.
The appliqué sequence
Section titled “The appliqué sequence”Applied to a closed path, an appliqué object emits, in order:
- Placement outline — a running stitch that marks exactly where the appliqué fabric goes.
- STOP — the machine pauses so you can lay your appliqué fabric over the marked outline.
- Tackdown — a narrow zigzag that tacks the fabric down just inside the edge.
- STOP — the machine pauses so you can trim away the excess fabric close to the tackdown.
- Border — a wider satin/zigzag border that covers the raw edge for the finished look.
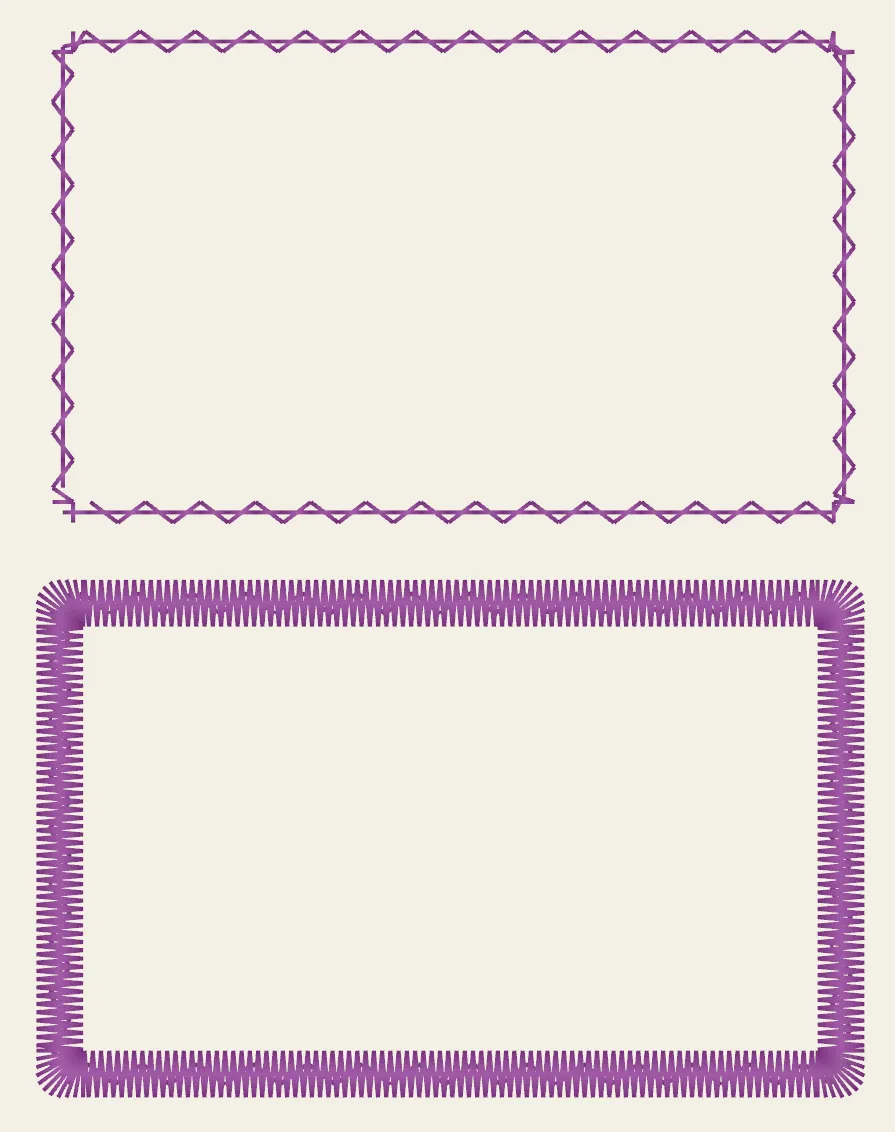 The tackdown zigzag over the placement outline (top), and the wider satin border that covers the raw edge (bottom).
Settings
Section titled “Settings”The appliqué object exposes each phase:
- Placement spacing — stitch length of the placement outline.
- Tackdown — on/off, plus its spacing and width (default a light 1.5 mm zigzag).
- Border — the covering satin/zigzag border’s spacing, width (default 3 mm) and pull compensation.
The defaults give a placement outline, a 1.5 mm tackdown zigzag and a 3 mm satin border — a sensible starting point you can tune per project.
Both the tackdown and the border are zigzags, so their spacing is measured peak to peak — the gap between penetrations on the same side of the line, on the same scale a satin column’s spacing uses.
Splitting into components
Section titled “Splitting into components”Split into components, at the bottom of the appliqué settings, breaks the object into the separate objects it sews: a running placement outline, the zigzag tackdown (if it has one) and the border — each on its own copy of the same path, and each still a live, editable stitch style rather than frozen points. So the border stays an editable zigzag/satin you can retune, and the three phases can be moved or reshaped independently.
They’re laid out in the object list so they still sew in the right order: placement first, border last.
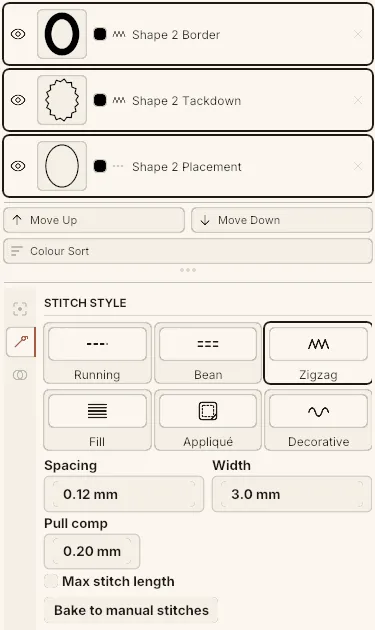 One appliqué becomes three objects, laid out to keep sewing in phase order. Each keeps a live stitch style rather than frozen points — the border selected here is still a zigzag, with its spacing, width and pull compensation there to retune.
Split it when you need to edit a phase in a way the appliqué settings don’t allow; leave it whole when you want the machine to stop for you.